“When disaster strikes, the time to prepare has passed.” This quote encapsulates the essence of readiness and the importance of planning ahead. Imagine waking up to the news of an impending hurricane, a sudden economic collapse, or even a global pandemic. Panic ensues as store shelves are emptied within hours. In these moments, the significance of having a well-stocked pantry becomes glaringly evident.
I remember the early days of the COVID-19 pandemic when my friend Mike, a dedicated prepper, invited me over to his house. While most of us were scrambling to find essentials, Mike’s pantry was a testament to foresight and preparation. His stockpile of #10 cans—large, durable cans of long-lasting food—was not only impressive but life-saving. For weeks, he and his family had access to nutritious meals without ever needing to leave their home.
This article delves into why #10 cans are essential for your survival pantry. We’ll explore the unique benefits of these cans, including their extended shelf life, cost-effectiveness, and space-saving advantages. By understanding what #10 cans are, the types of foods typically stored in them, and how to best incorporate them into your prepper pantry, you’ll be well-equipped to ensure your family’s readiness for any crisis.
Understanding #10 Cans
What Are #10 Cans?
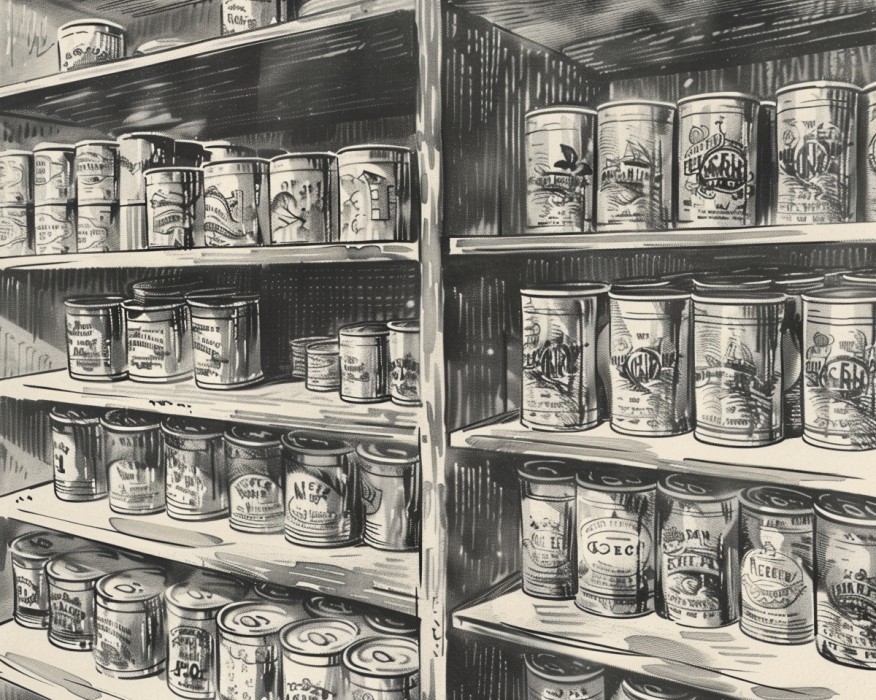
Let’s start with the basics: what exactly are #10 cans? If you’ve never encountered one, a #10 can is a large, durable container used primarily for storing food. These cans typically measure about 6 1/4 inches in diameter and 7 inches in height, holding approximately 109 ounces (or about 13 cups) of contents. Their generous size makes them ideal for bulk food storage, which is why they are a staple in the survivalist and prepper communities.
Size and Capacity
A single #10 can can feed a family for several days, depending on the contents and portion sizes. To put it in perspective, think of #10 cans as the industrial strength equivalent of your regular household canned goods. They are often used in institutional kitchens, restaurants, and of course, by preppers who prioritize being prepared for any situation.
- Diameter: 6 1/4 inches
- Height: 7 inches
- Volume: 109 ounces (approximately 13 cups)
Materials and Durability
#10 cans are made from sturdy, food-grade tin-plated steel. This material is chosen for its robustness and resistance to corrosion, ensuring that the contents remain safe and uncontaminated for long periods. The cans are sealed hermetically, which means they’re airtight and protect against moisture, pests, and other environmental factors that can degrade food quality.
Historical Context
The use of #10 cans for food storage dates back to the early 20th century. Initially, they were used in commercial kitchens and the military for their practicality and ability to preserve large quantities of food. During World War II, #10 cans played a crucial role in feeding soldiers and supporting the war effort. Their reputation for reliability and durability has only grown since then, making them a preferred choice for preppers and survivalists today.
How #10 Cans Compare to Other Storage Options
When it comes to food storage, there are several options available. However, #10 cans offer distinct advantages that make them stand out:
- Shelf Life: Foods stored in #10 cans can last between 10 to 30 years, depending on the contents and storage conditions. This is significantly longer than the shelf life of typical pantry items.
- Space Efficiency: The cylindrical shape of #10 cans allows for easy stacking and efficient use of storage space, a critical factor in any well-organized prepper pantry.
- Cost-Effectiveness: While the initial investment may be higher, buying in bulk and storing in #10 cans can be more economical in the long run, reducing the need for frequent restocking.
- Versatility: From freeze-dried fruits and vegetables to grains and powdered dairy products, a wide variety of foods can be preserved in #10 cans, catering to diverse dietary needs and preferences.
In contrast, other storage options like vacuum-sealed bags or plastic containers might not offer the same level of durability or long-term protection. Glass jars, while excellent for home canning, are fragile and take up more space. Mylar bags, although effective, require additional protective measures against physical damage and pests.
Understanding the benefits and specifications of #10 cans is the first step towards building a resilient and reliable survival pantry. These containers provide a blend of durability, longevity, and practicality that few other storage options can match. As we delve deeper into their uses and benefits in the following sections, you’ll see why #10 cans are a cornerstone of any serious prepper’s strategy.
Benefits of #10 Cans for Survival Pantry
Extended Shelf Life
When it comes to food storage, shelf life is paramount. The beauty of #10 cans lies in their ability to preserve food for the long haul. With proper storage conditions—cool, dry, and dark environments—many items stored in these cans can last between 10 to 30 years. Imagine the peace of mind that comes from knowing your family has a secure food supply that remains edible and nutritious for decades.
- Freeze-Dried Fruits and Vegetables: Retain most of their nutrients and flavor, lasting up to 25 years.
- Dehydrated Foods: Such as beans, rice, and pasta, can last 20-30 years.
- Powdered Dairy Products: Milk and cheese powder can stay fresh for up to 20 years.
- Proteins: Freeze-dried meats and TVP (textured vegetable protein) provide a long-lasting source of protein.
The extended shelf life is not just a feature; it’s a critical advantage. In times of crisis, access to fresh food might be limited or nonexistent. Having a pantry stocked with long-lasting #10 cans ensures that you can provide for your family without the constant worry of food spoilage or shortages.
Cost-Effectiveness
In the world of prepping, cost-effectiveness is a game-changer. While the initial investment in #10 cans might seem steep compared to smaller, everyday grocery purchases, the long-term savings are substantial. Buying in bulk often means lower prices per unit, and with the food lasting longer, you won’t find yourself constantly replacing spoiled items.
Consider the cost benefits:
- Bulk Buying Discounts: Many suppliers offer significant discounts when you purchase #10 cans in bulk. This reduces the overall cost per meal.
- Fewer Trips to the Store: With a well-stocked pantry, your trips to the grocery store can be less frequent, saving time and reducing impulse purchases.
- Less Waste: Food in #10 cans doesn’t spoil quickly, minimizing waste and maximizing the value of every dollar spent.
Space-Saving Advantages
For many preppers, space is at a premium. Whether you live in a compact urban apartment or a house with limited storage, maximizing your available space is essential. #10 cans are designed with space efficiency in mind. Their cylindrical shape allows for easy stacking, and they fit neatly on shelves or in storage bins, making them an excellent choice for compact storage areas.
- Efficient Stacking: The uniform size of #10 cans allows them to be stacked high, utilizing vertical space that might otherwise go unused.
- Optimized Storage: They fit neatly in cupboards, closets, or dedicated pantry spaces, ensuring that you can store a significant amount of food without clutter.
- Ideal for Limited Space: Even in small living environments, #10 cans can be organized effectively to make the most of every inch of available storage.
By choosing #10 cans, you can create a streamlined, organized pantry that ensures you have a robust food supply without sacrificing valuable living space. This makes them not only practical but also essential for anyone serious about preparedness.
Understanding the benefits of #10 cans highlights why they are an indispensable component of a well-stocked survival pantry. Their extended shelf life, cost-effectiveness, and space-saving advantages make them a smart investment for any prepper. In the next section, we’ll delve deeper into the practicalities of selecting and storing these cans to maximize their benefits and ensure you’re always ready for whatever comes your way.
Types of Foods Stored in #10 Cans
Non-Perishable Foods
When it comes to stocking your survival pantry, non-perishable foods are the backbone of any well-prepared supply. #10 cans are particularly well-suited for these types of foods, offering extended shelf life and ease of storage.
Grains (Rice, Oats): Grains are essential for any prepper pantry. They provide a substantial source of carbohydrates and energy, which are crucial in survival situations. Rice and oats stored in #10 cans can last for decades if kept in optimal conditions. These staples are versatile, easy to cook, and can be used in a variety of dishes to prevent meal fatigue.
Legumes (Beans, Lentils): Legumes are another critical component of a prepper pantry. They are rich in protein, fiber, and essential nutrients. #10 cans of beans and lentils can provide a reliable protein source, especially when fresh meat is not available. These legumes can be easily rehydrated and cooked, making them a convenient and nutritious option.
Freeze-Dried Vegetables and Fruits: Freeze-dried vegetables and fruits maintain most of their original nutritional value, taste, and texture. Storing these in #10 cans ensures you have access to essential vitamins and minerals. Whether it’s freeze-dried peas, carrots, or strawberries, these items can enhance the flavor and nutritional content of your meals, even in long-term storage scenarios.
Dehydrated Meats and Soups: Protein is a vital part of any diet, especially during stressful times when your body needs more energy. Dehydrated meats like beef, chicken, and fish, as well as hearty soups, can be stored in #10 cans for years. These foods are lightweight, easy to prepare, and provide the protein necessary to maintain muscle mass and energy levels.
Specialty Foods
Beyond the basic staples, #10 cans also offer a variety of specialty foods that can add variety and comfort to your survival diet.
Powdered Milk and Eggs: Dairy products can be challenging to store long-term, but powdered milk and eggs in #10 cans are excellent solutions. They provide essential nutrients like calcium and protein. Powdered milk can be reconstituted with water for drinking, cooking, or baking, while powdered eggs can be used in recipes just like fresh eggs.
Baking Ingredients (Flour, Sugar): Having the ability to bake can greatly enhance your food options. #10 cans of flour and sugar ensure that you can make bread, pastries, and other baked goods. These ingredients are not only important for their practical uses but also for their psychological comfort during challenging times.
Stocking your pantry with a variety of foods stored in #10 cans is a smart strategy for any prepper. From grains and legumes to freeze-dried vegetables, dehydrated meats, and specialty items like powdered milk and eggs, these cans offer a balanced and nutritious food supply that can sustain you and your family during any crisis. In the next section, we’ll explore how to select the right #10 cans and incorporate them into your overall food storage strategy to ensure you’re always ready for the unexpected.
How to Incorporate #10 Cans into Your Prepper Pantry
Assessing Your Needs
Before diving into the world of #10 cans, it’s essential to assess your family’s needs. Every family is unique, and understanding these differences can make all the difference in your preparedness strategy.
Family Size and Dietary Requirements: Start by evaluating the size of your household and any specific dietary needs. For instance, if you have children, you might want to stock up on items that are easy to prepare and kid-friendly. If anyone has allergies or specific dietary restrictions, ensure you have suitable alternatives stored.
Calculating Quantities: Once you understand your family’s needs, you can calculate the quantities required. A general rule of thumb is to plan for at least three months’ worth of food. Here’s a simple calculation to get started:
- Grains: 25 pounds per person per month.
- Legumes: 5 pounds per person per month.
- Freeze-Dried/Dehydrated Vegetables and Fruits: 5 pounds per person per month.
- Dehydrated Meats/Soups: 5 pounds per person per month.
Using these figures, a family of four would need approximately:
- 300 pounds of grains.
- 60 pounds of legumes.
- 60 pounds of freeze-dried vegetables and fruits.
- 60 pounds of dehydrated meats and soups for a three-month supply.
Creating a Shopping List
With your calculations in hand, it’s time to create a shopping list. This list should prioritize essential items first and then expand to include a variety of foods to ensure a balanced diet.
Prioritizing Essential Items: Start with the basics: grains, legumes, and protein sources. These are the foundation of any meal and provide essential nutrients. Next, add fruits and vegetables to ensure you have a good supply of vitamins and minerals. Finally, consider comfort foods and baking ingredients to keep morale high during tough times.
Budgeting Tips: Stocking up on #10 cans can be a significant upfront investment, but it’s crucial for long-term savings. Look for sales, bulk buying options, and group purchases with friends or community members. Buying in bulk not only saves money but also ensures you have a substantial stockpile ready for any crisis.
Storage Solutions
Proper storage is key to maintaining the longevity and quality of your #10 cans. Here are some best practices to keep your pantry organized and your food safe.
Best Practices for Long-Term Storage:
- Cool, Dry, and Dark: Store your cans in a cool, dry place away from direct sunlight. Basements or dedicated storage rooms are ideal.
- Off the Ground: Keep your cans off the ground to prevent moisture from seeping in and causing rust.
- Label and Rotate: Clearly label each can with the purchase date and expiration date. Use the FIFO (First In, First Out) method to ensure you’re using the oldest cans first.
Organizing for Easy Access:
- Shelving Units: Invest in sturdy shelving units that can hold the weight of the cans. Adjustable shelves can help accommodate different can sizes.
- Categorize: Organize your pantry by food type—grains on one shelf, legumes on another, and so on. This makes it easier to find what you need quickly.
- Accessibility: Place frequently used items at eye level and heavier items on lower shelves to prevent accidents.
By understanding your family’s needs, planning and prioritizing your shopping list, and organizing your storage effectively, you can ensure that your #10 cans are a reliable and convenient part of your survival pantry. In the next section, we’ll explore how to make the most out of your #10 cans, including tips for opening, using, and preserving their contents.
Tips for Using #10 Cans
Opening and Resealing
Using #10 cans effectively starts with knowing how to open and reseal them properly. Given their size and the potential for waste if not handled correctly, it’s crucial to master these skills.
Tools Needed: The first step is having the right tools. A heavy-duty can opener is essential. Avoid using standard kitchen can openers as they might not withstand the size and thickness of #10 cans. Instead, opt for a commercial-grade can opener or a specialized #10 can opener available in many preparedness stores.
Proper Techniques: When opening the can, ensure you do it on a stable surface to prevent spills and accidents. Place the can opener on the lid, ensuring it grips firmly. Turn the handle smoothly and steadily until the lid is fully cut. Lift the lid carefully to avoid sharp edges. If the can contains a liquid, it’s wise to have a container ready to pour the contents into, reducing the risk of spills.
Maintaining Freshness
Once opened, maintaining the freshness of the contents is paramount. Without proper storage, the food inside can quickly spoil, defeating the purpose of having a long-term storage solution.
Tips for Keeping Contents Fresh After Opening:
- Transfer to Airtight Containers: If you don’t plan to use the entire contents immediately, transfer the remaining food into airtight containers. Mason jars, vacuum-sealed bags, or plastic containers with tight seals work well.
- Refrigeration and Freezing: Some contents, like dehydrated vegetables or freeze-dried fruits, can last longer if stored in the refrigerator or freezer after opening. Ensure they are in airtight containers to prevent moisture from getting in.
- Desiccant Packs: For dry goods like grains and legumes, placing desiccant packs or oxygen absorbers in the storage container can help maintain dryness and extend shelf life.
- Labeling: Always label the new containers with the date of opening and the type of food. This practice helps in keeping track of freshness and ensures you use older stock first.
Recipe Ideas
Incorporating #10 can ingredients into your daily meals can be a breeze with the right recipes. Here are a few simple and delicious recipes that make the most of these pantry staples.
Hearty Bean Soup: Ingredients:
- 1 cup dried beans (from a #10 can)
- 1 can diced tomatoes
- 1 chopped onion
- 2 cloves garlic, minced
- 1 tsp cumin
- 1 tsp chili powder
- Salt and pepper to taste
Instructions:
- Soak the beans overnight, then drain and rinse.
- In a large pot, sauté the onion and garlic until fragrant.
- Add the beans, tomatoes, and spices.
- Cover with water and bring to a boil. Reduce heat and simmer for 1-2 hours until beans are tender.
- Season with salt and pepper to taste.
Quick Fried Rice: Ingredients:
- 2 cups cooked rice (from a #10 can of rice)
- 1 cup freeze-dried vegetables
- 2 eggs, beaten
- 2 tbsp soy sauce
- 1 tbsp vegetable oil
- 1 tsp sesame oil
- Salt and pepper to taste
Instructions:
- Rehydrate the vegetables according to package instructions.
- In a large skillet, heat vegetable oil over medium heat.
- Add the rehydrated vegetables and sauté for 2-3 minutes.
- Push the vegetables to the side of the skillet and pour in the beaten eggs, scrambling until cooked.
- Add the cooked rice and soy sauce, mixing everything together.
- Drizzle with sesame oil and season with salt and pepper to taste.
Versatile Pancakes: Ingredients:
- 1 cup flour (from a #10 can)
- 1 tbsp sugar
- 1 tbsp baking powder
- 1 cup powdered milk (reconstituted with water)
- 1 egg
- 2 tbsp vegetable oil
Instructions:
- In a bowl, mix flour, sugar, and baking powder.
- In another bowl, whisk together the reconstituted milk, egg, and vegetable oil.
- Combine the wet and dry ingredients until just mixed.
- Heat a lightly oiled griddle over medium heat. Pour batter onto the griddle, using approximately 1/4 cup for each pancake.
- Cook until bubbles form on the surface, then flip and cook until browned on the other side.
By mastering the techniques for opening and resealing #10 cans, maintaining the freshness of their contents, and using them in practical recipes, you can maximize the utility of these essential prepper pantry items. In the next section, we’ll explore real-life success stories and case studies that highlight the importance and effectiveness of using #10 cans in survival scenarios.
Conclusion
Recap of Key Points
Incorporating #10 cans into your survival pantry is not just a practical decision; it’s a strategic move towards ensuring long-term food security and peace of mind. These large, durable cans offer numerous benefits that make them indispensable for preppers. We’ve explored the versatility and reliability of #10 cans, highlighting their extended shelf life, cost-effectiveness, and space-saving advantages. By understanding what #10 cans are and what foods can be stored in them, you can build a robust food storage system that caters to your family’s needs.
We’ve also delved into how to effectively incorporate #10 cans into your prepper pantry, from assessing your family’s dietary requirements to creating a comprehensive shopping list and finding the best storage solutions. Practical tips on using #10 cans, maintaining freshness, and even some simple recipe ideas have been provided to help you make the most of these essential storage items.
Real-life examples and success stories have shown us the value of being prepared and the critical role that #10 cans can play during emergencies. We’ve discussed common mistakes and how to avoid them, ensuring that your investment in #10 cans is maximized and your food storage remains effective.
Call to Action
Now that you have a comprehensive understanding of why #10 cans are essential for your survival pantry, it’s time to take action. Begin or enhance your prepper pantry with these versatile storage solutions. Start by assessing your needs, creating a shopping list, and finding the right storage solutions. Don’t wait for a crisis to strike; proactive preparation is the key to resilience.
In the world of prepping, the peace of mind that comes with being prepared is unmatched. By investing in #10 cans and building a well-stocked pantry, you are taking a significant step towards self-sufficiency and security. You are not just preparing for a possible crisis; you are ensuring that your family has the resources to face any challenge head-on.
Imagine the confidence you’ll feel knowing that your pantry is stocked with nutritious, long-lasting food. Picture the sense of relief and resilience that comes with knowing you have prepared for the unexpected. This is not just about survival; it’s about thriving even in the face of adversity.
So, take the leap. Start incorporating #10 cans into your survival pantry today. Embrace the journey of practical preparedness, and join a community of individuals committed to resilience and readiness. Your future self, and your loved ones, will thank you for it.